Mastering Fibonacci Confluence: The Price Percent Range Indicator
Trading financial instruments requires a clear understanding of market cycles and key structural pivot points. Many retail traders fail because they react to random intraday price fluctuations, buying into overextended rallies or selling at the very bottom of healthy market retracements. To gain a legitimate statistical edge, professional market technicians rely on mathematical exhaustion levels to time their entries. The Price Percent Range Indicator addresses this need by combining Williams Percent Range ($%R$) logic with institutional Fibonacci levels within a unified tracking framework.
Here is an analytical breakdown of how this specialized sub-window oscillator operates and how to exploit its multi-tiered reversal matrix.
The Algorithmic Mechanics of Percent Range Scaling
The core architecture of the Price Percent Range indicator updates classic momentum scaling. Traditional momentum oscillators frequently flatten out at extreme levels during powerful institutional trends, providing premature overbought or oversold alerts that can wipe out a trader's capital.
To overcome this structural flaw, the indicator measures where the current closing price sits relative to a mathematically optimized high-to-low channel over a specified lookback period. The resulting data stream is then plotted against fixed horizontal tracking lines based on Fibonacci ratios ($23.6\%$, $38.2\%$, $61.8\%$, and $76.4\%$). This layout helps day traders evaluate trend maturity. It visualizes the precise boundary zones where institutional profit-taking is likely to trigger a sharp directional reversal.
Reading the Sub-Window Oscillator Matrix
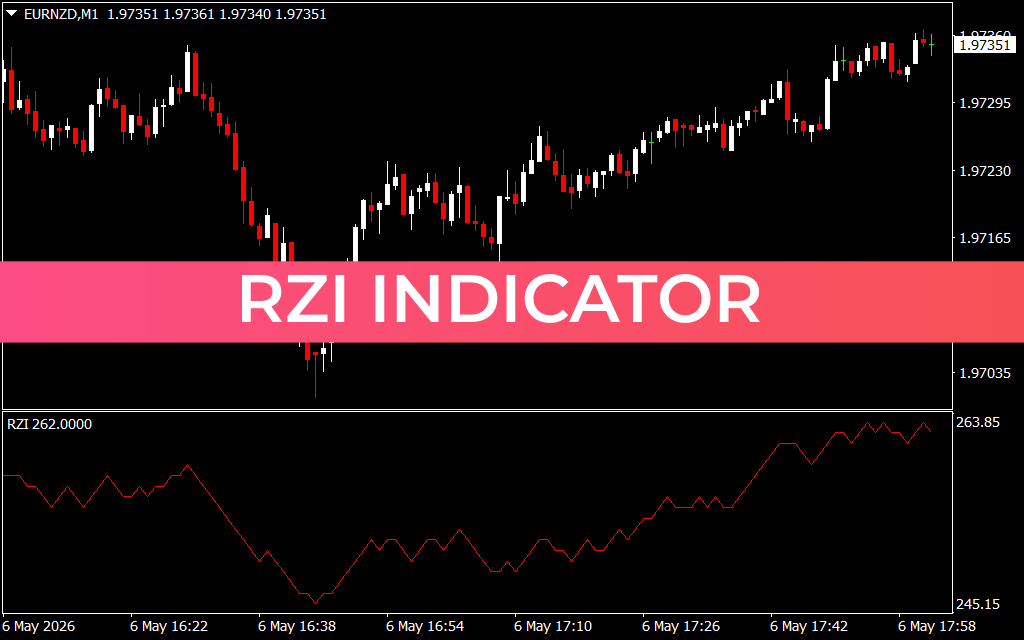
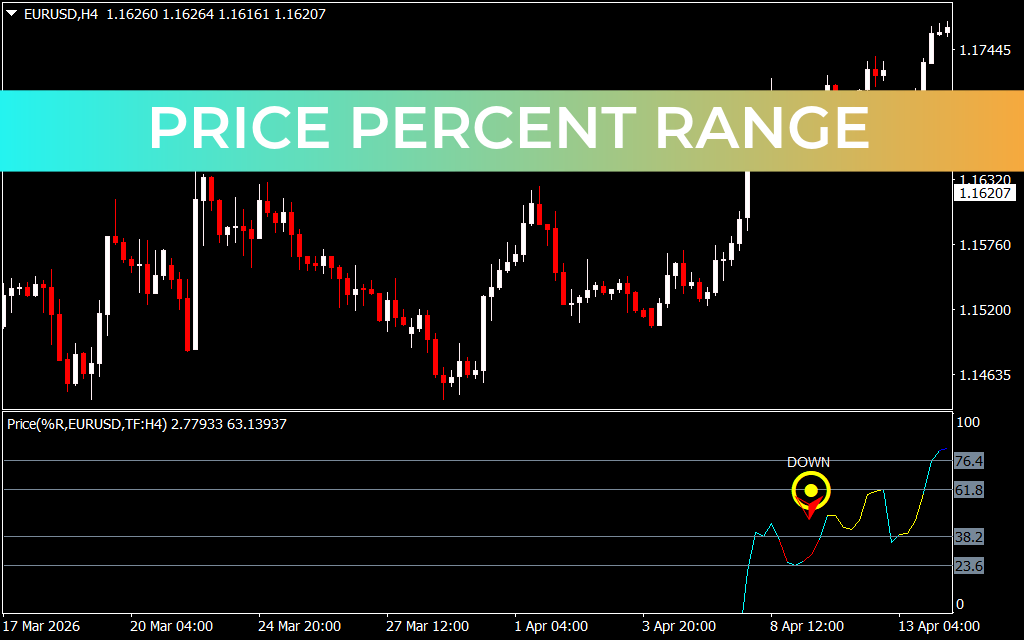
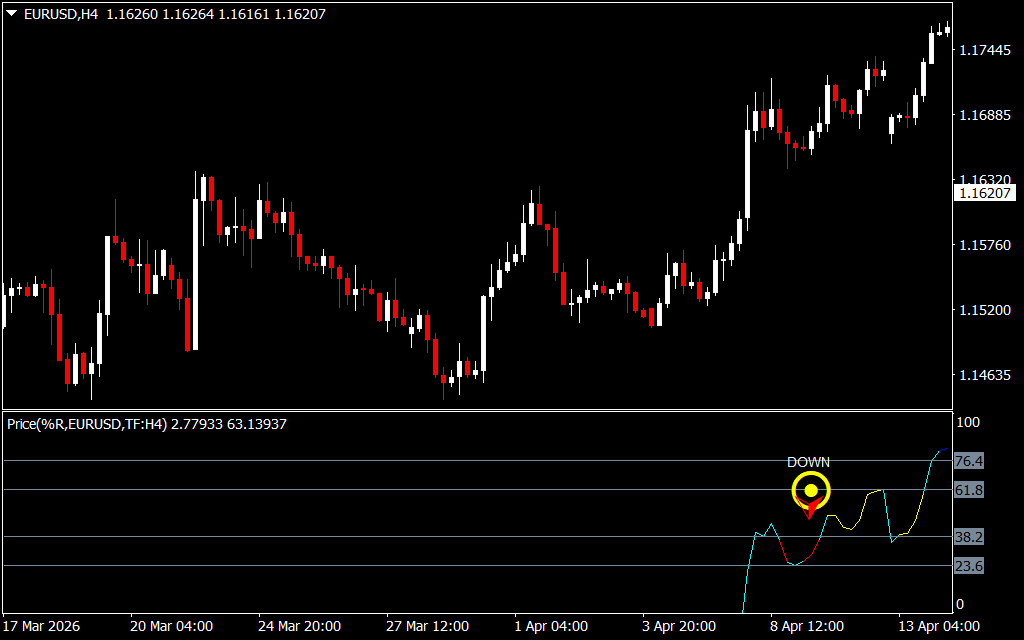
As demonstrated on the EUR/USD 4-hour chart setup, the indicator replaces standard line chaos with a structured, color-coded momentum track:
- The Dynamic Velocity Track (Multi-Color Line): The indicator features a highly responsive tracking line that changes color based on immediate momentum shifts. It shifts to bright cyan during active accumulation phases and turns red during dominant liquidation legs, providing an immediate snapshot of trend velocity.
- The Overbought Exhaustion Ceiling ($76.4\%$ Line): When the velocity line rallies above the $76.4\%$ horizontal boundary, it warns that the asset is heavily overextended. Entering long positions in this upper zone carries high structural risk.
- The Oversold Accumulation Floor ($23.6\%$ Line): Conversely, when the tracking track drops below the $23.6\%$ baseline, it indicates a deep seller liquidation. This zone alerts buyers to monitor the market closely for potential structural reversal setups.
- The Algorithmic Directional Alert (The Yellow DOWN Node): To ensure execution discipline, the system prints localized execution icons—such as a yellow targeted "DOWN" node accompanied by a red arrow—the exact moment the momentum track breaks back below an overextended threshold line.
Operational Guidelines for High-Probability Execution
To extract the maximum technical value from the Price Percent Range toolkit on your terminal, implement these active management rules:
- Trade the Trend Exhaustion Crossovers: Prime your short execution positions when the oscillator line climbs deep into the overbought ceiling and prints an official yellow "DOWN" validation node. This multi-layered trigger confirms that buying velocity is drying up at major structural resistance levels.
- Utilize Multi-Timeframe Confirmation: Filter out minor consolidation noise by matching your lower-timeframe execution charts with higher-period structures. An intraday reversal signal carries a much higher win rate when it aligns with an exhaustion node on the H4 chart.
- Objective Risk Boundaries: Place your defensive stop-loss orders just beyond the physical price swing peak created during the indicator's crossover event. If price breaches that level, it proves that institutional capital is continuing to push the trend, invalidating the reversal setup.
3 Downloads
Last Update:
May 17, 2026 02:45 AM
Published:
Jan 20, 2026 22:13 PM
Category: